Share this article
Providing a thoughtful recurring giving program and building strong relationships with your recurring donors can provide a stable foundation for your organization by bringing in thousands of dollars each month. Qgiv offers tools you can use to promote your recurring giving program and make your recurring donors feel recognized and appreciated!
1. Recurring receipts
In the Receipts section of your form-level control panel, you’ll find a variety of receipts specifically for recurring giving! You can toggle each of the receipts on and off to fit your particular program. Each receipt is editable so you can include messaging tailored just for your recurring donors! Click Edit to access the existing default content and tweak it however you’d like.
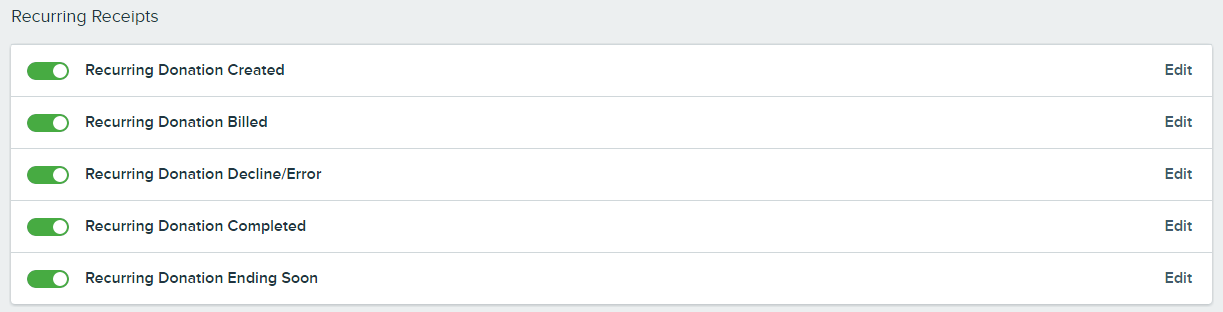
Here’s a little information about each receipt:
Recurring Donation Created goes out when a donor sets up a recurring donation.
Recurring Donation Billed goes out to thank donors for their continued support every time an installment of a recurring donation is billed. If toggled on, this is what recurring donors will receive instead of the standard donation receipt.
Recurring Donation Decline/Error is sent to let donors know an installment of their recurring donation didn’t go through so they can take any necessary action to remedy the situation, such as updating payment information by calling your organization or logging into their donor account (if they have one!).
Recurring Donation Completed is sent out when the last installment of a recurring gift is completed (this is only applicable if the donor chose an end date—you can turn the option to choose an end date on and off in your Form Settings).
Recurring Donation Ending Soon goes out shortly before a recurring gift comes to an end. The default content asks donors to visit your donation page if they’d like to continue their generous support.
2. Widgets
Widgets are a great way to embed your donation form or amounts container on any page of your organization’s website or any other relevant web page. You can also choose to display a preselected option on your form for donors, such as a certain donation amount, restriction, pledge, or event. A great use-case for widgets is to create a new form for your recurring giving program and then embed that form using the widget feature. You can set apart your recurring giving program by creating a recurring giving button in addition to your one-time donation button. When donors reach the recurring giving area of your site, they’ll be taken to the embedded form you’ve configured for your recurring giving program.
Pro tip: Make sure you detail the impact of recurring gifts, shown in the image above. You can do this in your form settings by entering a description when you’re adding a donation amount!
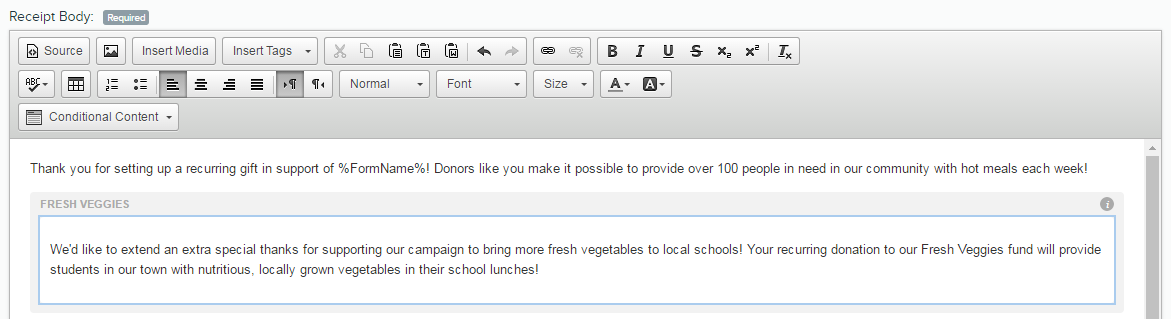
3. Conditional Content
You can customize your receipts with messaging targeting recurring donors by using conditional content blocks. If you’d like to thank recurring donors for giving to a particular restriction, you can drop a conditional content block into your recurring donation created or billed receipt. If a donor gives to the restriction (or restrictions) associated with that block, the content you entered will appear in the receipt! Otherwise, the donor will only see the content outside of the block. This is a great way to thank recurring donors who are giving to an ongoing campaign.
4. Email Integrations
Currently, we have integrations with Constant Contact, Campaign Monitor, and MailChimp. You can export data, including donor name, email address, and information about their giving to existing email lists in your third-party email program. This is useful for segmenting donors so you can send your recurring givers targeted messaging. Once you’ve gotten them on a separate list, you can be sure to avoid sending out wasteful (and potentially annoying) requests for monthly giving to people who have already made that commitment.

If you’re a Klaviyo user, they’ve created an integration with Qgiv from their side.

5. Share your form
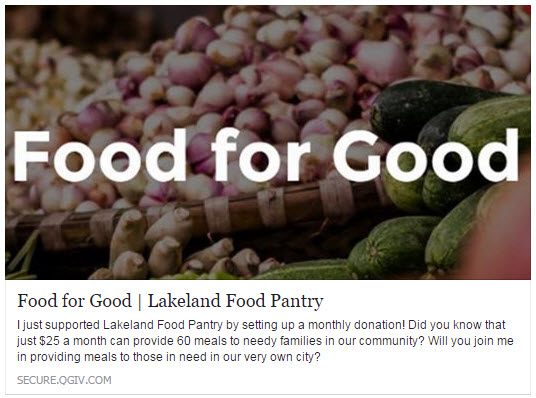
Your form and online confirmation page have social sharing buttons so donors can share a link to your form on their social media pages after making a donation. You can customize the image and text that appear in those posts by visiting the Share Your Form section of your form-level control panel. You can include information about recurring giving and encourage your donors’ social networks to get involved!
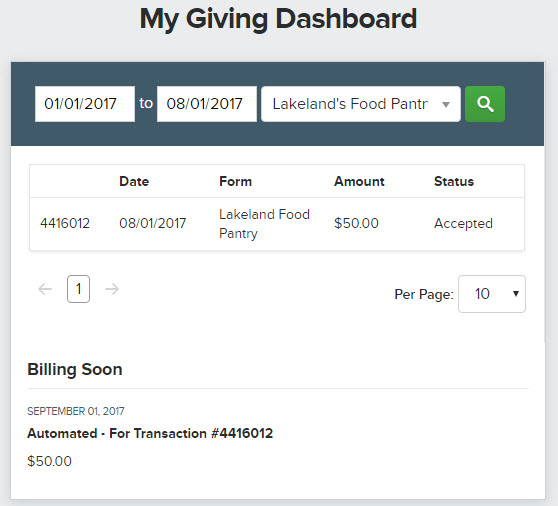
6. Donor Accounts
You can also offer donors the option to manage their own recurring payments by toggling on donor accounts. When a donor creates an account, they can log in and store payment methods, as well as manage their recurring gifts. This is a great way to great way to empower donors to update their gifts.
You might enjoy

Donor segmentation: how to power stronger communications
Donor acquisition and retention

15 sponsorship letter templates to spark new partnerships
Donor acquisition and retention

How to write a meaningful donor thank-you letter
Donor acquisition and retention